Did you know, you can setup your domain name POP email account in Gmail and you can send and receive from your @domain name email address so you still keep a professional appearance?
In Gmail you are able to setup 5 alternative email addresses to send and receive emails from within your one Gmail account.
You can also create labels for each of these accounts and assign a different color to each address. This makes it easy to identify emails for each address in your inbox.
Why would I need my domain name email setup in a Gmail account?
There are a number of benefits to doing this:
- As a backup: Even if you have your email account setup in an email client on your device, such as Apple Mail or Outlook, you can use this as an email backup service. Hardware and software fail – that’s a fact, and let’s be honest most of us don’t backup our computers or devices as we should, this way at least you have a copy of your emails in the cloud.
Google gives you 15GB free storage space when you create an account. Even if you require more than the 15GB at some point, you can upgrade your storage at a very reasonable price.
(100 GB for $1.99 a month, 200 GB for $2.99 a month or 2,000 GB for $9.99 a month) - Accessing Emails without your devices: if you need access to your emails and you don’t have access to your computer or mobile device. You can access your Gmail account from any device connected to the internet provided you know the password.. This can be extremely useful in an emergency situation when you need access to your emails or attachments.
Step-by-Step Guide on How to Set Up a Domain POP Email Account in Gmail
To set up a domain POP email account in Gmail, you will need to:
- Enable POP in Gmail.
2. Add your domain email account to Gmail.
3. Configure your domain email account settings in Gmail.
How to Enable POP in Gmail
- Go to your Gmail inbox.
2. Click the “Settings” gear icon in the top right corner.
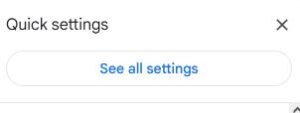
3. Select “See all settings”.

4. Click the “Forwarding and POP/IMAP” tab.
5. Under “POP Download”, select “Enable POP for all mail”.
6. Click **Save Changes**.
How to add your domain email account to Gmail.
0
- Go to your Gmail inbox.
2. Click the “Settings” gear icon in the top right corner.
3. Select “See all settings”.
4. Click the “Accounts and Import” tab.
5. In the “Check mail from other accounts (using POP3)” section, click “Add a POP3 mail account you own”.
6. Enter your domain email address and password.
7. Click “Next”.
8. Enter the following POP server settings:
* POP server: mail.yourdomainname.com
* Port:995
* Use SSL:Yes
9. Click “Add Account”.

How to configure your domain email account settings in Gmail
- Go to your Gmail inbox.
2. Click the “Settings” gear icon in the top right corner.
3. Select “See all settings”.
4. Click the “Accounts and Import” tab.
5. Under “Send mail as”, click “Add another email address you own”.
6. Enter your domain email address and password.
7. Click “Next”.
8. Select “Treat as an alias”.
9. Click “Add Account”.
Once you have completed these steps, your domain POP email account will be set up in Gmail. You will be able to receive and send emails from your domain email address within Gmail.
How to send an email from your domain email address in Gmail:
1. Click the “Compose” button.
2. In the “From” field, click the “Change” drop-down menu and select your domain email address.
3. Compose your email and click “Send”.
How to receive emails in Gmail from your domain email address:
All emails sent to your domain email address will be delivered to your Gmail inbox. You can view them just like any other email message.
Note: If you have trouble setting up your domain POP email account in Gmail, you can contact your email hosting provider for assistance.


